Route Diary has been designed to be easy to use, with the familiar gestures you are used to in an iOS and iPadOS environment.
Creating a Trip
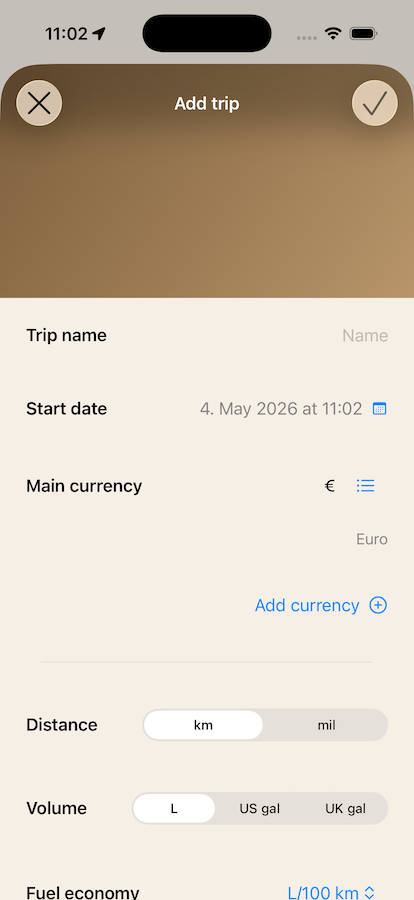
Aside from self-explanatory settings such as name, vehicle make and model, and odometer, there are some other settings worth knowing.
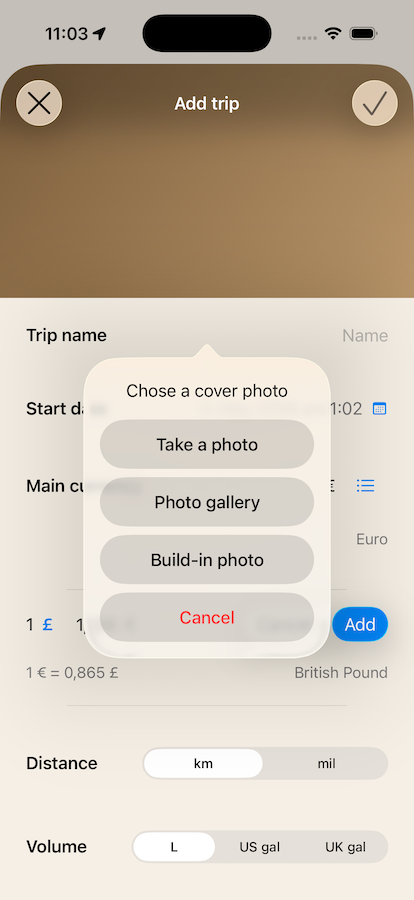
- By tapping the color gradient at the top, you can set a cover photo for your trip.
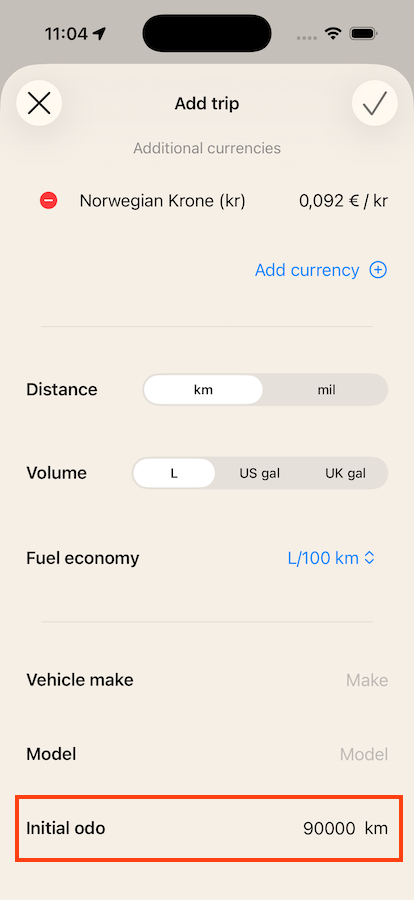
- You can add additional currencies.
- You can set your preferred units for different metrics such as distance, mileage, and volume.
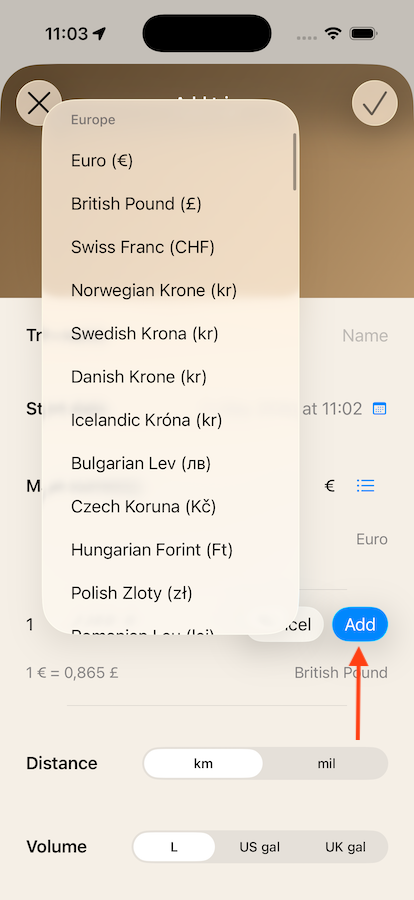
Adding Currencies
Main Currency
You can set your main currency for the trip. Once set, it cannot be changed. Your main currency doesn't necessarily have to be a currency you will use on the trip — rather, it should be a currency familiar to you. For example, if you live in Europe and your daily routine involves Euros, and you go on a road trip in Morocco, you can still use Euros as your main currency to keep a clear overview of your expenses.
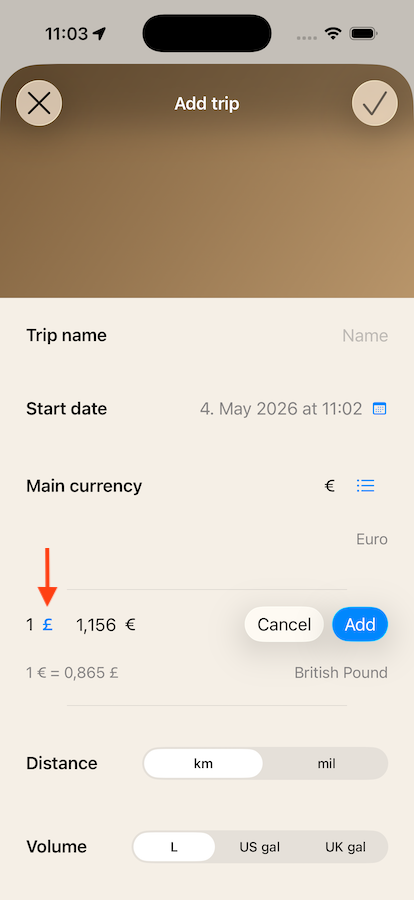
If you are travelling across different countries with different currencies, you can set up the trip to support multiple currencies.
- Tap "Add Currency."
- Tap the currency symbol on the left and select the new currency from the list.
- If enabled in Settings, the exchange rate will be fetched automatically from the internet. You can also set it manually.
- Tap "Add" to add the currency to the trip.
Odometer
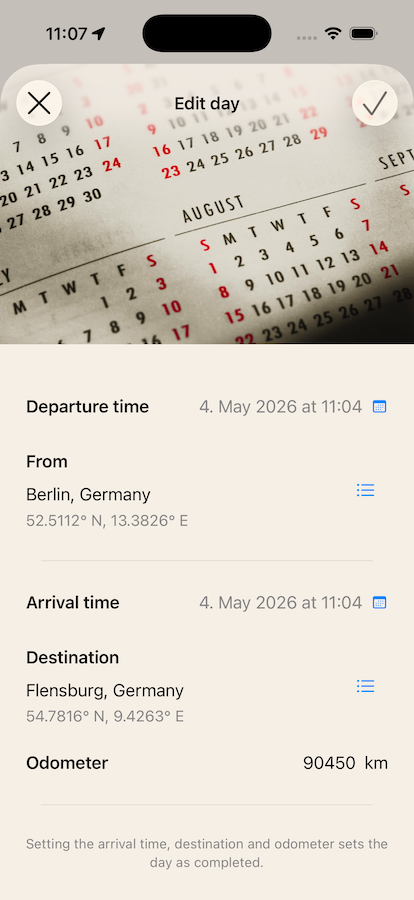
It is important to enter your vehicle's odometer reading at the beginning of the trip. At each fuel stop, you can input the current odometer reading to calculate your vehicle's fuel consumption. You can also record the odometer at the end of each day, giving you a log of how far you are riding daily and throughout the trip overall.
Editing Trip Settings
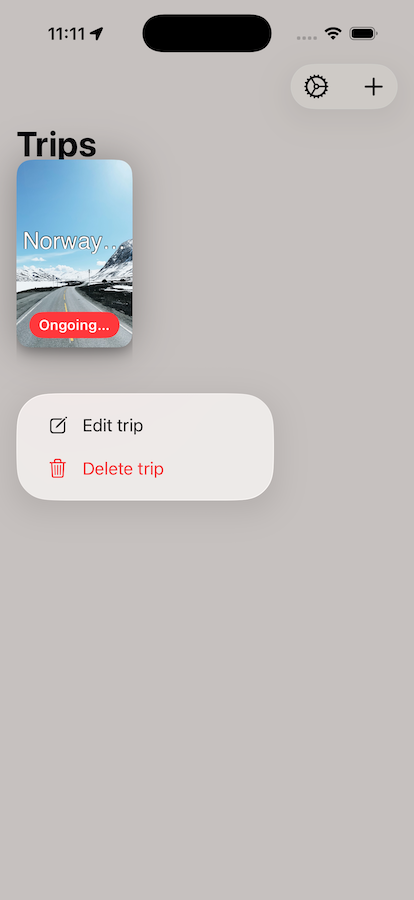
You can long-press the trip card at any time to access the options to edit or delete the trip. Please note that deleting a trip does not delete the photos taken within it. These will still be available for export in the Storage Gallery, found in the Settings section of the app.
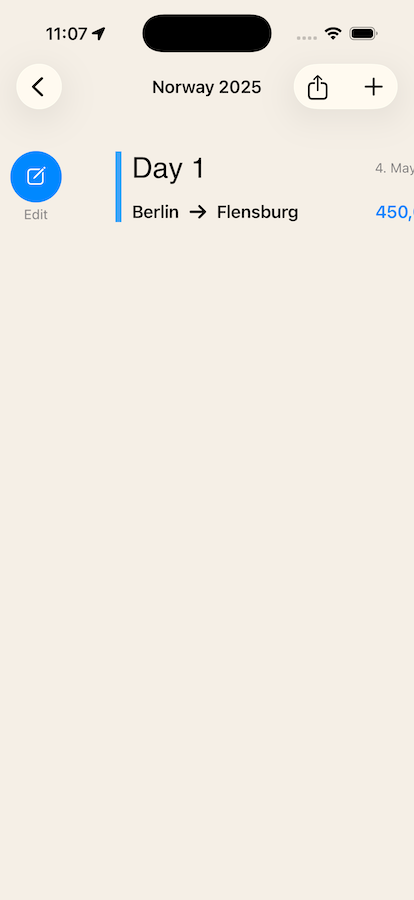
Creating a Day
When you create a trip, a first day is created automatically.
When a day is created, the starting location is taken from your current position (if location access is allowed), along with the current date and time.
At the end of your riding day, edit the day by swiping it from left to right, and add your destination, arrival time, and odometer reading. All other day settings can also be edited at any time.
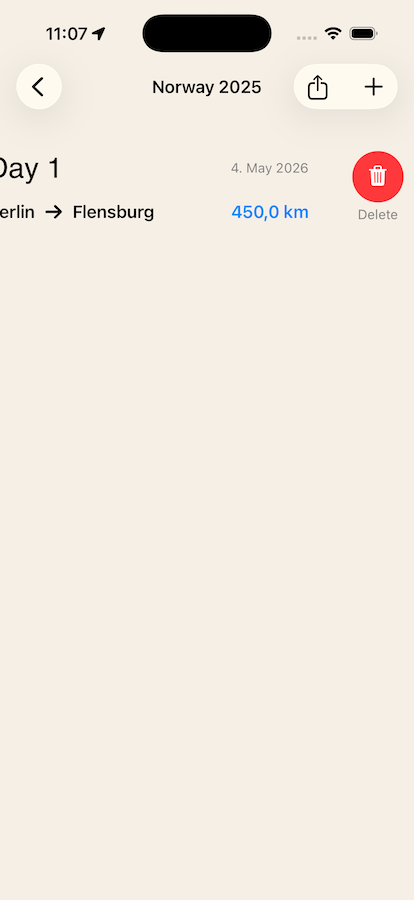
To delete a day, swipe it from right to left. Please note that deleting a day is irreversible.
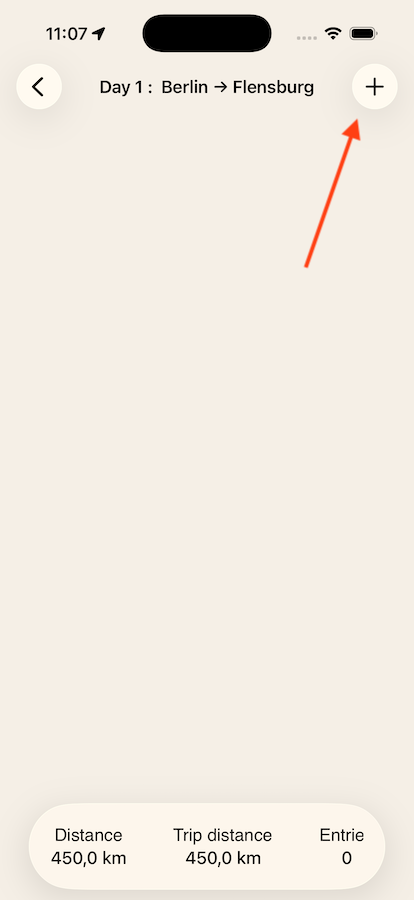
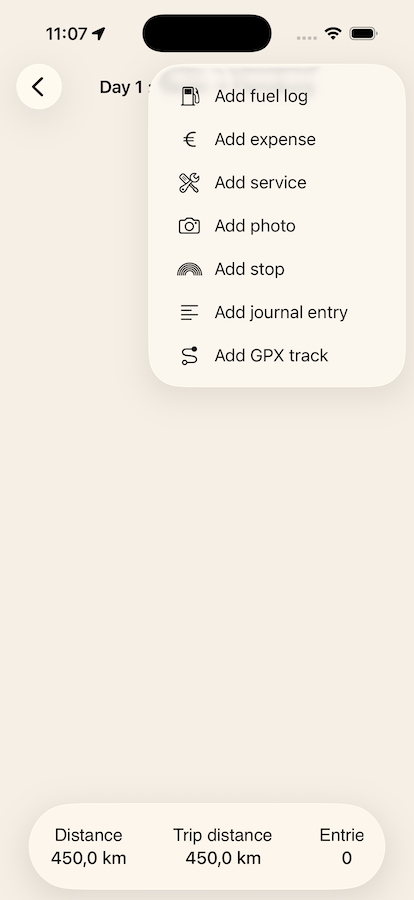
Adding Entries to a Day
When you navigate into a day, you can add different types of entries by tapping the "+" button at the top right of the screen. The available entry types are:
- Fuel Log
- Expense
- Service
- Photo
- Stop
- Journal
- GPX
Just like days, entries can be edited or deleted using the same swipe gestures — swipe right to edit, swipe left to delete.
Most entry types are self-explanatory, but a few details are worth mentioning.
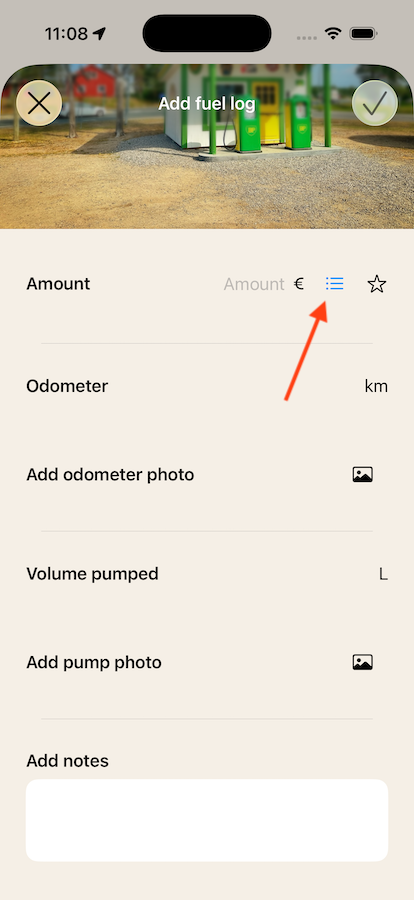
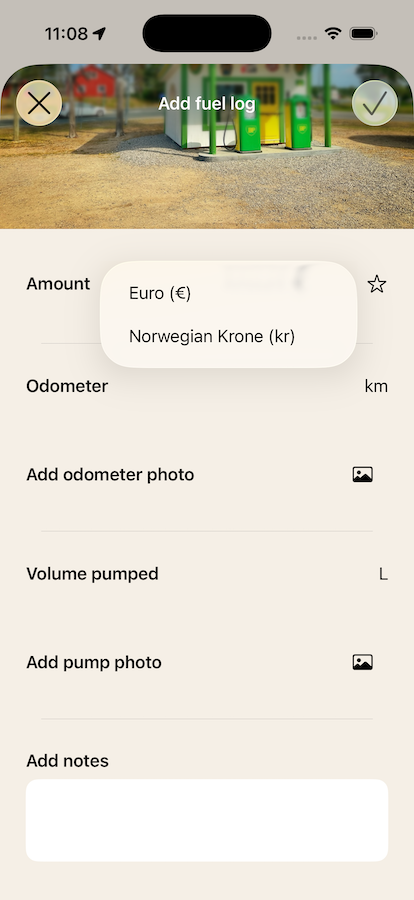
Fuel Log, Expense, and Service entries all have an associated cost. The amount can be entered in any of the currencies you have set up for the trip — simply select the currency from the menu.
The exchange rate between your main currency and any secondary currencies can be adjusted at the time of entry, but cannot be edited once the entry has been saved.
Exchange rates can be updated automatically, or fetched manually by tapping the currency symbol button. This behaviour is configurable in the app's Settings.
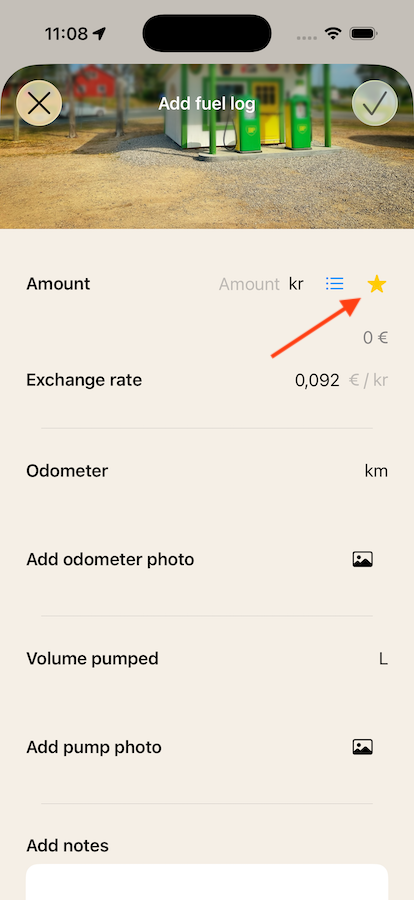
Preferred Currency
In addition to the main currency, the app features a preferred currency, which you can set by tapping the star next to the currency symbol. This currency will appear first in the currency list. This is particularly useful on longer trips where you spend a significant amount of time in one country — setting the preferred currency to match means you don't have to select it manually for every expense. You can change the preferred currency at any time.
For consistent and reliable mileage calculations, it is important to enter the odometer reading at every fuel stop. Inconsistent entries will produce unreliable consumption figures. Note that most vehicles also have their own onboard fuel consumption indicators, which may differ from the values calculated by the app.
GPX Tracks
Route Diary does not record GPX tracks directly. However, the GPX entry type allows you to upload a GPX file generated by an external navigation device such as a Garmin or TomTom.
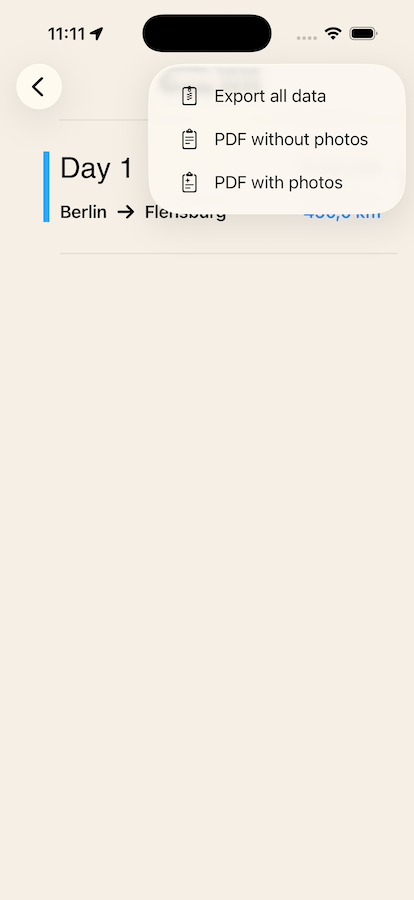
Exporting a Trip
The ultimate goal of Route Diary is to give you something you can hold in your hands — a record of your journey you can come back to. There are three export options:
A full PDF summary of all entries, with photos included at the end of each day.
The same PDF, but without photos.
The PDF with photos, plus all photos and GPX tracks from the trip exported in their original digital format.